7 Straightforward Steps to Migrate Your Web site to a New Net Host

[ad_1]
There are lots of causes emigrate your web site to a brand new internet host. Possibly you’re experiencing extra downtime than you have to be, sad along with your web site loading velocity, or on the verge of outgrowing your present supplier’s assets.
Whatever the purpose, your new internet host ought to facilitate a clean migration with no interruption to your day-to-day operations. With a supplier like Hostinger, you get free skilled migration with all of their internet hosting plans, plus an intuitive internet hosting administration dashboard, quick load occasions, and a 99.9% uptime assure.
Loopy Egg’s Favourite Instruments for Migrating Your Web site
When making an attempt emigrate your website to a brand new internet host, it’s essential to discover a high quality new house to your web site that can each supply improved internet hosting and make the migration course of a breeze. Have a look under at our three favourite internet hosting suppliers for migration:
Hostinger delivers free skilled migration alongside its extremely inexpensive internet hosting plans. Strive Hostinger internet hosting risk-free with a 30-day money-back assure.
DreamHost is a WordPress-recommended internet hosting supplier that gives a free plugin to allow you to migrate your WordPress website with none interruptions. Join DreamHost and get a deal on internet hosting, professional providers, or a brand new area.
SiteGround is without doubt one of the most dependable internet hosts round with its 99.9% uptime assure, plus free skilled migration on choose plans. Choose a SiteGround plan at this time and get 80% off common charges.
Extra High Net Internet hosting Companies
The three choices above are our Golden Eggs, our prime picks on the earth of internet hosting. However they’re hardly alone—the variety of internet hosting suppliers in the marketplace is sufficient to make your head spin. Luckily, we’ve completed the heavy lifting of researching them for you. Try our publish on the most effective internet hosting providers to get critiques of the highest suppliers and recommendation on the way to decide the proper one.
Step 1 – Get Began with Hostinger
We at Loopy Egg fee Hostinger extremely as a internet hosting supplier. It’s a killer mixture of affordability, reliability, and options you’d should pay extra to get from others. Extra importantly for this information, Hostinger presents free skilled migration.
First, you’ll want to move to Hostinger’s web site and select a plan. There’s a vary of choices, from low-cost shared plans for one web site to sturdy VPS internet hosting packages.
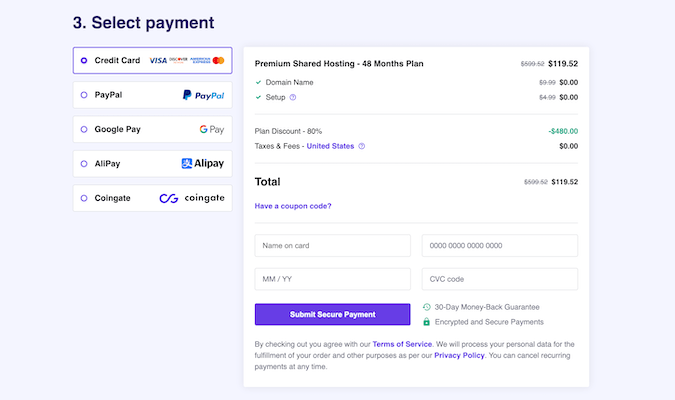
For the needs of this publish, we’ll go along with their hottest providing: the Premium Shared Internet hosting plan. While you’ve chosen your plan, simply click on Add to Cart to provoke the checkout and sign-up course of.
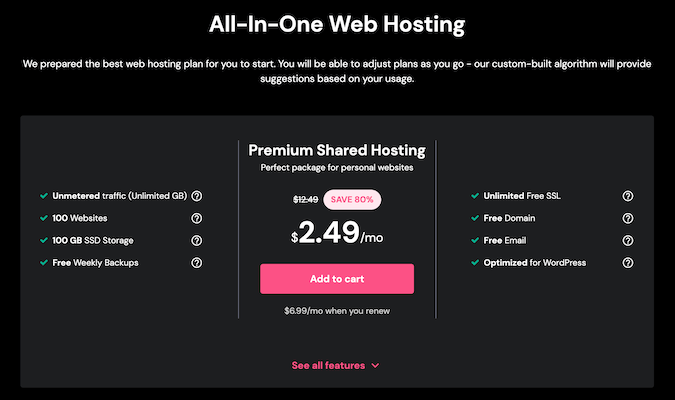
Like most internet hosts, Hostinger presents a low introductory worth. Nevertheless, the value goes up when it’s time to resume your plan. The nice factor is that Hostinger presents clear pricing. You’ll be able to see clearly upfront that the Premium Shared Internet hosting plan begins at $2.49 per 30 days, then renews at $6.99 per 30 days.
While you add a plan to your cart, Hostinger will then current preliminary dedication choices for that plan. Selecting an extended contract time period will provide you with probably the most worth for cash.
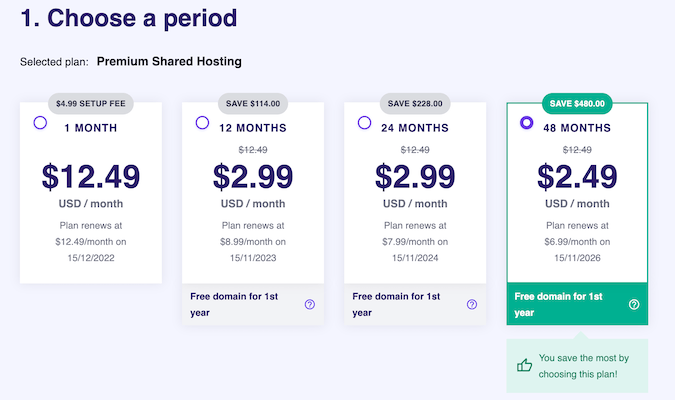
You’ll be able to select from phrases starting from one month (leading to month-to-month billing) to 12, 24, or 48-month contracts. As you see within the picture above, the strong promotional fee is just out there while you pay for 4 years of internet hosting upfront. Which means you lock in an important worth level, however you’ll have to pay simply shy of $120 at checkout.
Hostinger additionally presents a free area for the primary yr on some plan choices, beginning with the 12-month time period.
On the identical web page, scroll all the way down to enter your electronic mail deal with or join a Hostinger account along with your Fb or Google account.
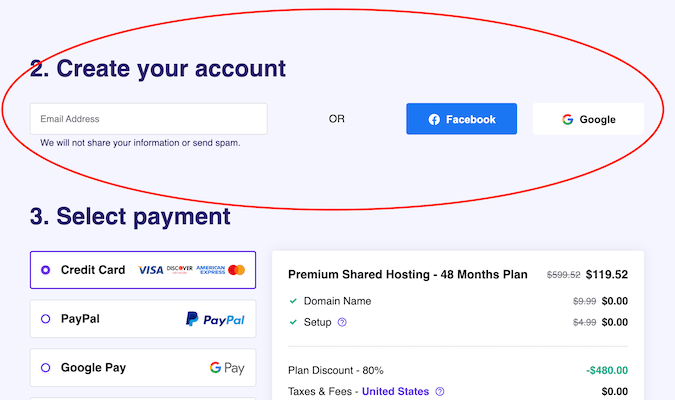
Lastly, enter your fee particulars and click on Submit Safe Cost to finish the acquisition.
It’s price noting that the method is comparable whatever the internet host you’re migrating to. Most different internet hosting suppliers supply an analogous checkout course of, together with variable charges based mostly in your preliminary time period dedication.
Step 2 – Submit a Migration Request
Most internet hosts supply skilled migration, however bear in mind that many cost you for dealing with the migration for you. You don’t have to fret about that with Hostinger since they provide managed migration freed from cost.
Hostinger will ask you should you require migration throughout the preliminary setup, permitting you to decide into their migration service when you’re getting all the main points taken care of. Or, you may request the migration after going by means of the first-time setup course of by going into your Hostinger account dashboard.
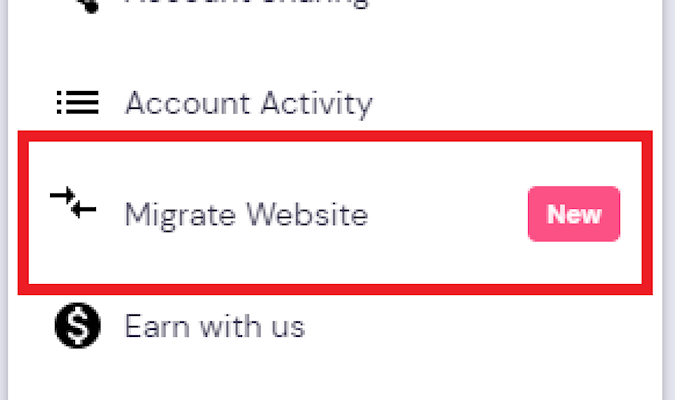
To do that, log into your Hostinger account. Subsequent, click on the Profile icon on the highest proper of your display.

From the drop-down menu that seems, click on Migrate Web site.
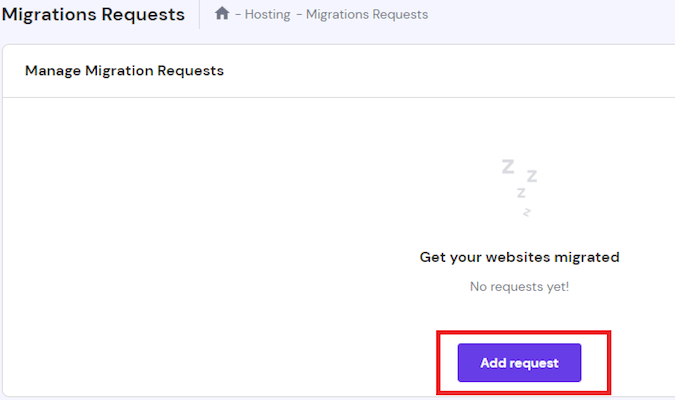
You’ll be greeted with a principally clean display (except you’ve requested a migration from this Hostinger account earlier than). In the course of that display, click on Add request to provoke a migration request. This prompts Hostinger to create a migration request type and add it to their assist queue.
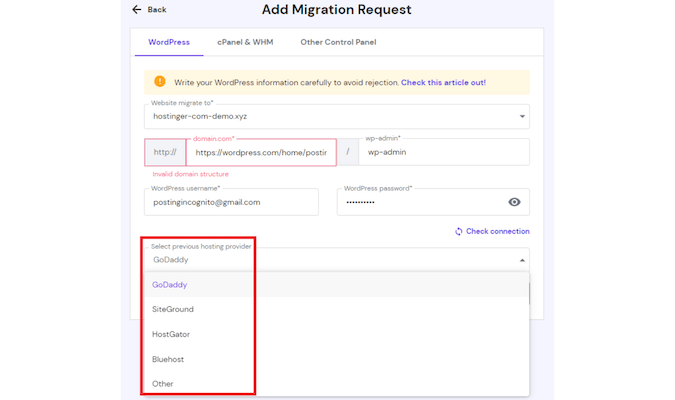
The subsequent step is vital. You’ll want to pick out the kind of management panel you utilize on the host you’re migrating from. Verify your present supplier should you’re not sure. You’ll see within the Hostinger interface there are alternatives for WordPress, cPanel/WHM, and different management panel configurations.
When you’ve decided what your outdated host’s management panel is, click on on the suitable tab within the Hostinger migration interface. Add your credentials for the internet hosting account you’re migrating from into the supplied fields after which click on Verify connection.
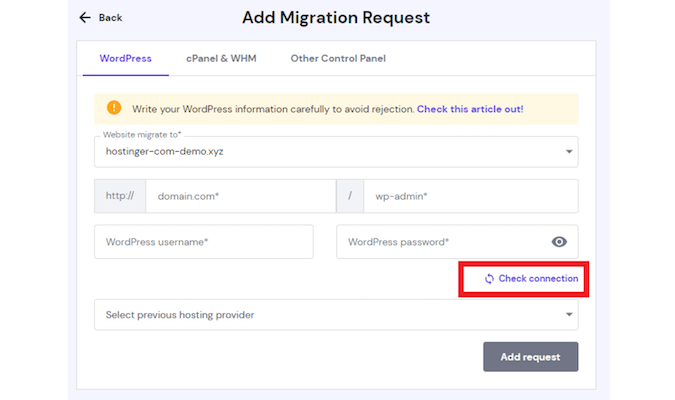
Hostinger will test your info to make sure that the credentials are right and, if the whole lot checks out, select your present internet hosting supplier from the drop-down menu and click on Add request.
It takes lower than 48 hours to switch your web site to Hostinger, which is splendidly quick for a free service.
You’ll obtain an electronic mail notification as soon as the switch is full. It’s also possible to test the migration standing by clicking the Handle Migrations Requests tab while you return to the Migrate Web site part of your profile. This part may even checklist the subsequent steps to soak up case your migration is unsuccessful.
In case your migration is profitable, congratulations! You’ll be able to skip all the way in which all the way down to Step 7.
Nevertheless, should you don’t go along with Hostinger or you could have another purpose emigrate manually, learn on for a couple of steps on the way to accomplish that.
Step 3 – Export Your Web site Information (for Guide Migration)
Not all hosts supply free migration—some cost round $100 for dealing with it for you—and even managed migrations in any respect. On this case, you’ll seemingly wish to deal with this manually.
To begin, you’ll have to switch your web site information to a brand new host. It is best to have the ability to keep your website’s performance, content material, themes, and plugins so long as you don’t tamper with the location information after obtain. This course of seems completely different relying in your present host.
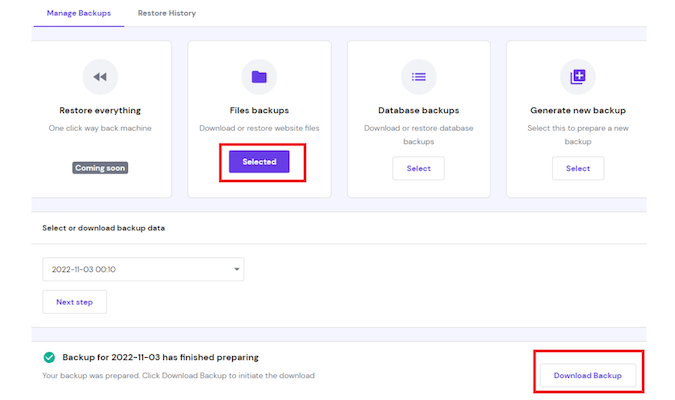
It is best to have the ability to obtain your web site backup information out of your cPanel. Simply you should definitely obtain the newest backup. Confer with your internet hosting supplier’s information base for the precise steps for downloading your website information. You’ll be able to see an instance of the place yow will discover and obtain these backups under (which reveals the interface in Hostinger).
Alternatively, you may manually export your web site information with a File Switch Protocol (FTP) software. FileZilla is a terrific possibility and is free to make use of. You’ll simply have to create an FTP account in FileZilla utilizing your internet hosting account’s FTP particulars.
You’ll find these particulars in your internet hosting supplier’s management panel by in search of a piece for FTP accounts. Beneath is what it seems like in Hostinger’s hPanel (Hostinger’s proprietary model of cPanel).
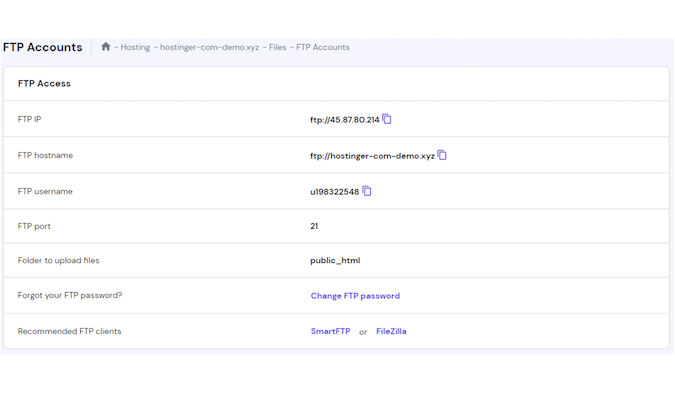
Once more, seek the advice of your host’s information base or assist for the way to hook up with an FTP host. Upon getting them related, you may obtain your web site information from FileZilla onto your pc.
Step 4 – Obtain the Web site Database Backups
You’ll additionally have to obtain your database backup. The database backup, which accommodates your web site’s settings and content material, is completely different out of your web site information.
Most content material administration techniques (CMS) like Joomla, WordPress, and Magento have a database. Nevertheless, static HTML web sites shouldn’t have a database. In case your web site is static HTML, you might skip this step.
These CMS platforms are inclined to make it straightforward to export your database. Alternatively, you may typically discover a means to try this by means of your internet host’s dashboard as properly. In Hostinger, for instance, yow will discover it by clicking by means of Information > Backups > Database backups inside hPanel.
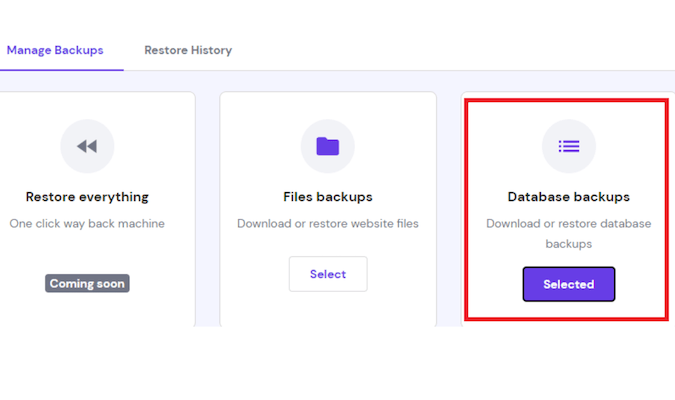
Choose the information to obtain and click on Obtain to switch the ZIP file of your database backup to your pc.
Step 5 – Switch Your Web site Information and Database Backup
First, bear in mind to unzip your web site information. You received’t have the ability to add a ZIP to your new host.
Subsequent, join your new internet hosting account to your FTP shopper, similar to FileZilla. It is going to allow you to add your information to the brand new internet hosting supplier.
Whereas your FTP shopper can deal with importing your web site information, you’ll want to enter your host’s dashboard to add your database backup.
First, create a brand new database with the brand new host. This can differ between suppliers, so you may discuss with their tutorials or assist for steerage.
Utilizing Hostinger’s interface for example, yow will discover a piece for databases by going into your website part of hPanel. Then, discover MySQL Databases and click on New Database.
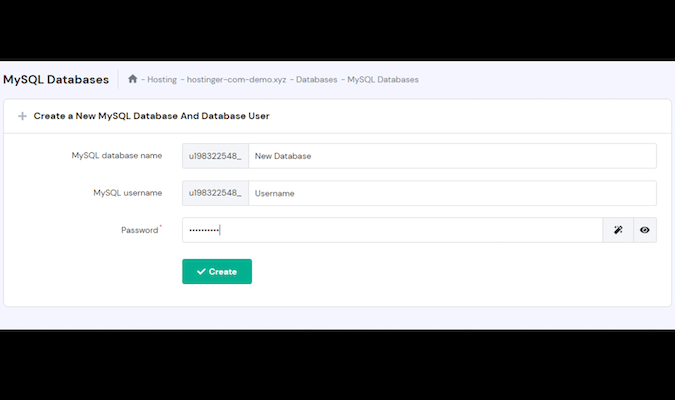
Contemplate retaining the identical database title, username, and password out of your outdated host. It is going to make it simpler to recollect your credentials, and also you received’t should replace the database configuration settings.
The final step right here is to go to phpMyAdmin from inside your new internet hosting account. Then, choose the brand new database you created and import it.
Step 6 – Replace Configuration Particulars
You might want to alter the configuration settings relying in your CMS. For instance, WordPress web sites are infamous for requiring wp-config.php file updates. However, once more, you may discuss with your CMS’s information base for the exact configuration steps after migrating a web site.
Don’t overlook to check your web site afterward, too. Ideally, the web site shouldn’t expertise downtime when switching between hosts. Simply guarantee there aren’t any new errors or points when the location goes stay in your new internet hosting supplier. That is simply usually a very good time to ensure all went easily, checking each the entrance and backends to make sure that the settings match your web site’s specs and taking a while to get accustomed to your new host’s dashboard and management panel.
Step 7 – Level Your Area to Hostinger’s Servers
The final a part of the method is to alter your present nameserver to your new internet host’s nameservers. This step ensures that you should utilize your area along with your internet hosting plan and that anybody getting into that URL will arrive at your web site.
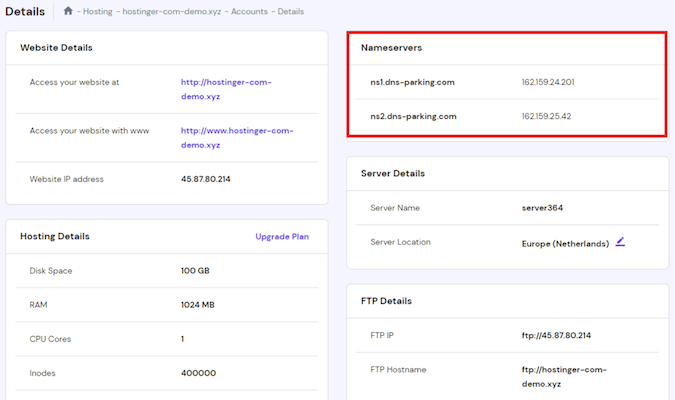
Wait till you get the affirmation electronic mail that the migration is profitable earlier than pointing your area. You’ll want to alter the nameserver to Hostinger’s. The Hostinger nameservers will rely in your internet hosting plan.
For instance, nameservers for Hostinger’s shared and cloud internet hosting plans are:
- ns1.dns-parking.com
- ns2.dns-parking.com
Whereas the nameservers for Hostinger’s cPanel internet hosting plans embrace:
- cdns1.main-hosting.eu
- cdns2.main-hosting.eu
It’s also possible to verify the proper nameserver by navigating to your Hostinger dashboard and clicking Handle subsequent to your internet hosting plan. Then, click on See Particulars beneath the internet hosting plan to view nameserver particulars.
You’ll be able to solely level to the Hostinger nameserver out of your area registrar’s account. The modifications take between 24 and 48 hours to take impact.
Upon getting the nameserver info from Hostinger, log into your area registrar’s area administration web page. Then, click on on the registered area title you wish to level to the brand new host’s nameserver.
It is best to see choices to click on, like Nameservers or Host Handle. Click on on the suitable button to edit the nameserver to level to Hostinger’s servers. It’s also possible to contact assist or discuss with your area registrar’s information base for the particular steps of updating your nameserver.
Lastly, don’t overlook to avoid wasting your modifications. And, with that, you could have efficiently transferred your web site to a brand new host!
[ad_2]
Source_link