Find out how to Automate Uninteresting search engine marketing Duties

[ad_1]
Some search engine marketing processes contain repetitively clicking issues on a display screen. Not the perfect use of your time.
With the correct instruments, nonetheless, you possibly can automate varied search engine marketing processes—and liberate sources for duties that want extra artistic, human enter.
On this publish, I’ll share two examples of how I automate search engine marketing duties.
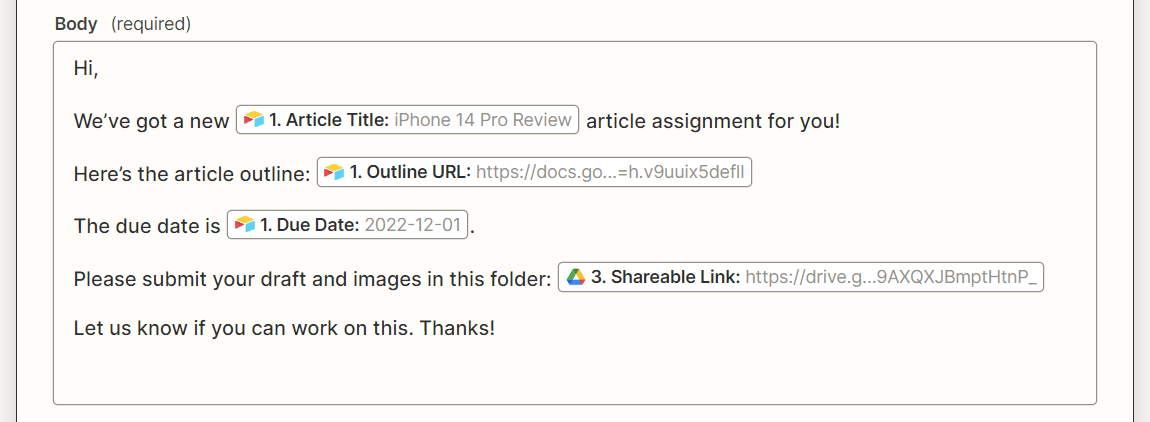
Think about with the ability to report and electronic mail article assignments to writers in seconds utilizing a easy kind like this:
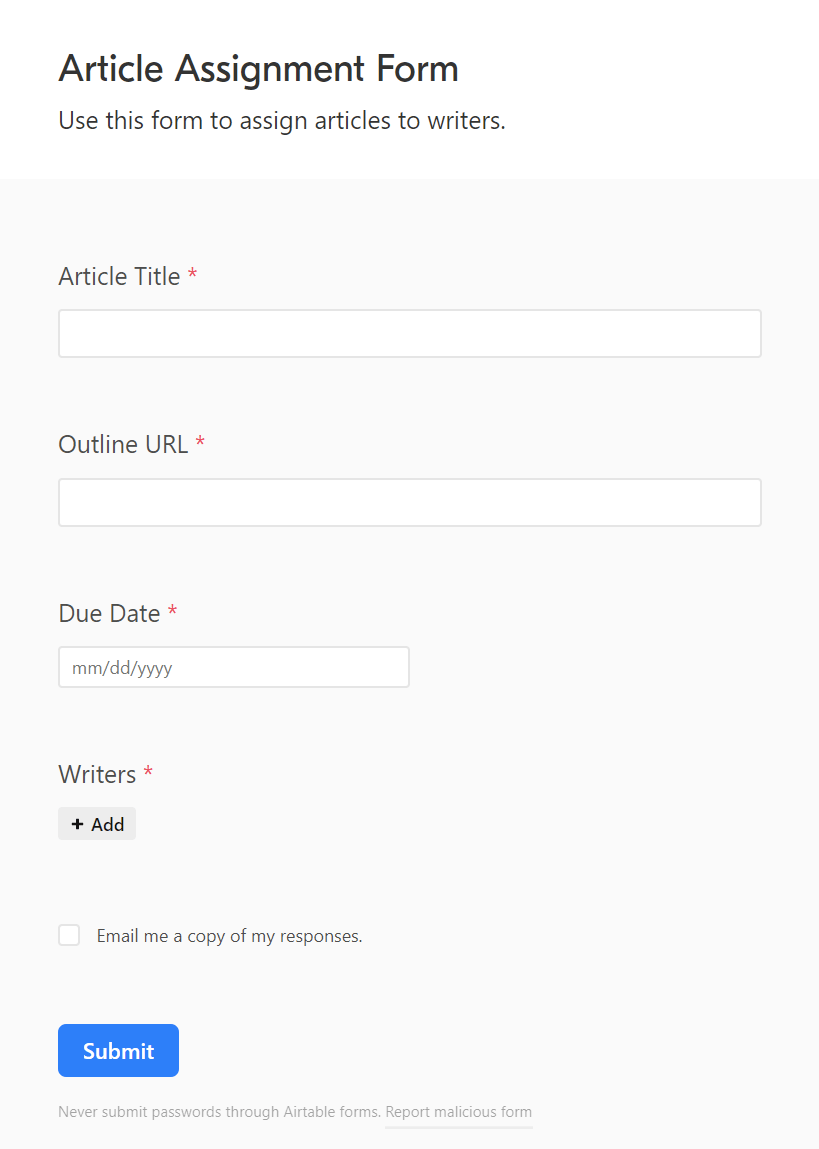
Let’s take a look at learn how to set this up.
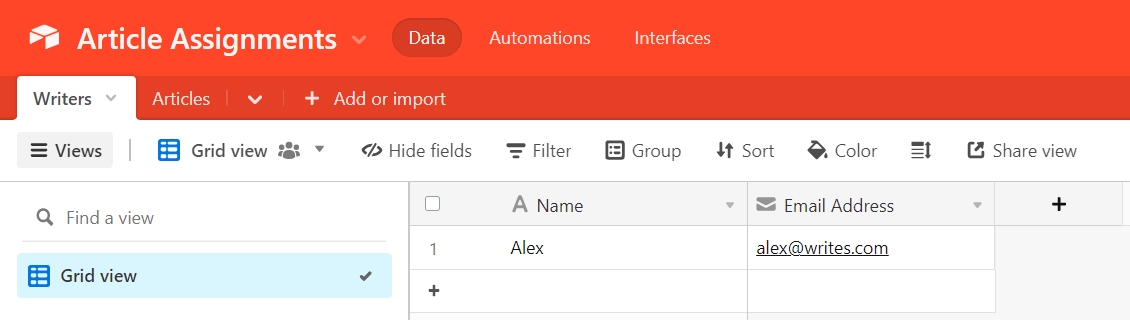
1. Arrange an Airtable database in your author and article knowledge
Join Airtable and create a brand new database with a desk referred to as “Writers.” The desk ought to have columns in your writers:
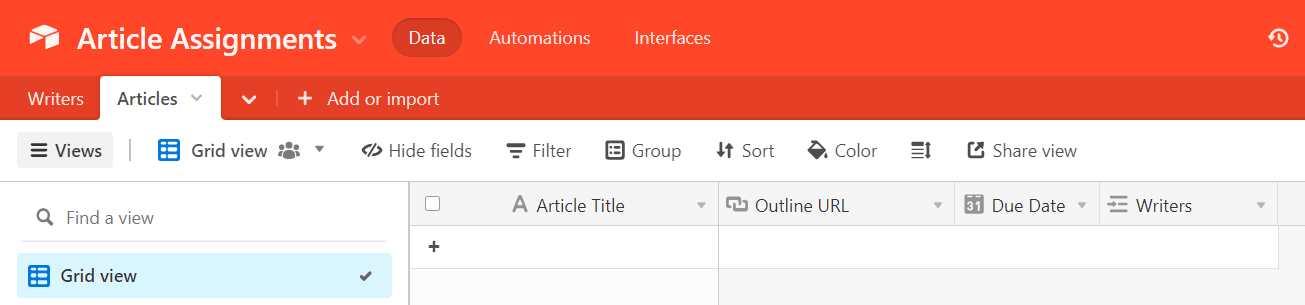
In the identical Airtable database, create a separate desk referred to as “Articles.”
Arrange columns on this desk for your:
- Article titles.
- Article define hyperlinks.
- Article due dates.
- Assigned author (set this column up as a linked report to your “Writers” desk in order that Airtable can retrieve knowledge in your writers from it).
You’ll additionally must add a lookup subject to tug the author’s electronic mail handle from the “Writers” desk.
2. Create an Airtable article project kind
Subsequent, create an article project kind for the “Articles” desk. You’ll use this way so as to add new article assignments to the “Articles” desk.

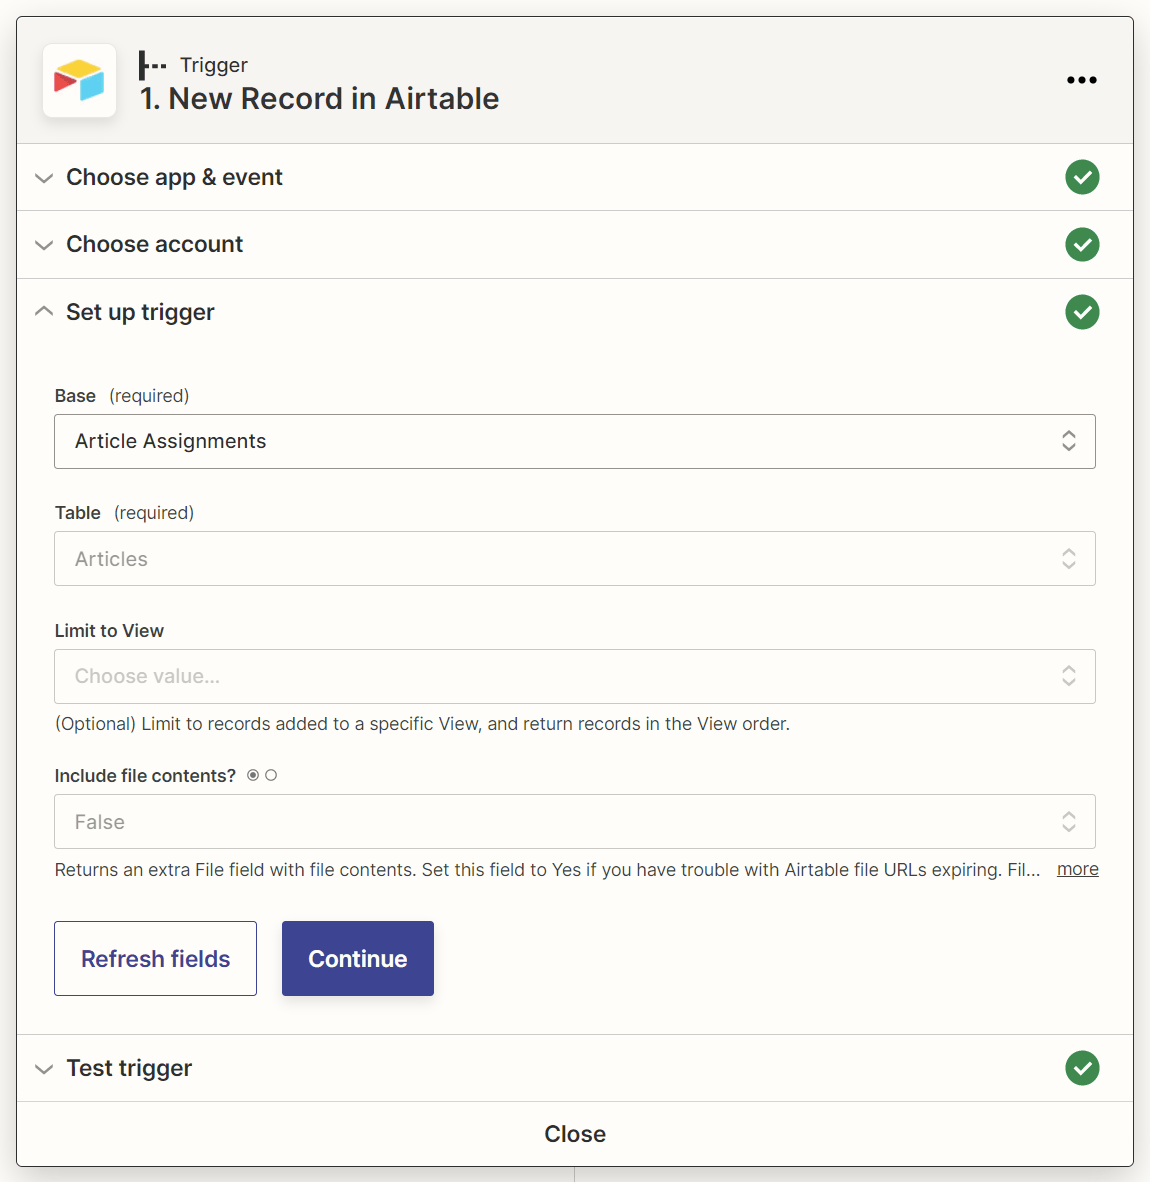
3. Arrange a brand new Zapier automation with a “New Document in Airtable” set off
Whenever you submit your particulars on the brand new article project by way of the Airtable kind, Airtable will robotically report the brand new article project in your “Articles” desk. In order that’s step one of the article project workflow sorted.
Now, we’ll use the Zapier workflow automation software to automate the following three steps within the workflow—particularly:
- Create a shared Google Drive submission folder for the article.
- Create a Google Doc submission doc within the shared Google Drive folder.
- Use Gmail to electronic mail the author the article title, define hyperlink, due date, and hyperlink to the shared Google Drive submission folder.
Sidenote.
As an alternative of Zapier, you can even use another workflow automation software, similar to Make, so long as the software helps the automation triggers and actions you’ll want.
In Zapier, create a brand new automated workflow (also referred to as a “Zap”) with:
- Airtable because the set off app.
- New Document because the set off occasion.
With this set off, your Zap will begin working whenever you add a brand new report to Airtable (similar to by submitting your Airtable article project kind).
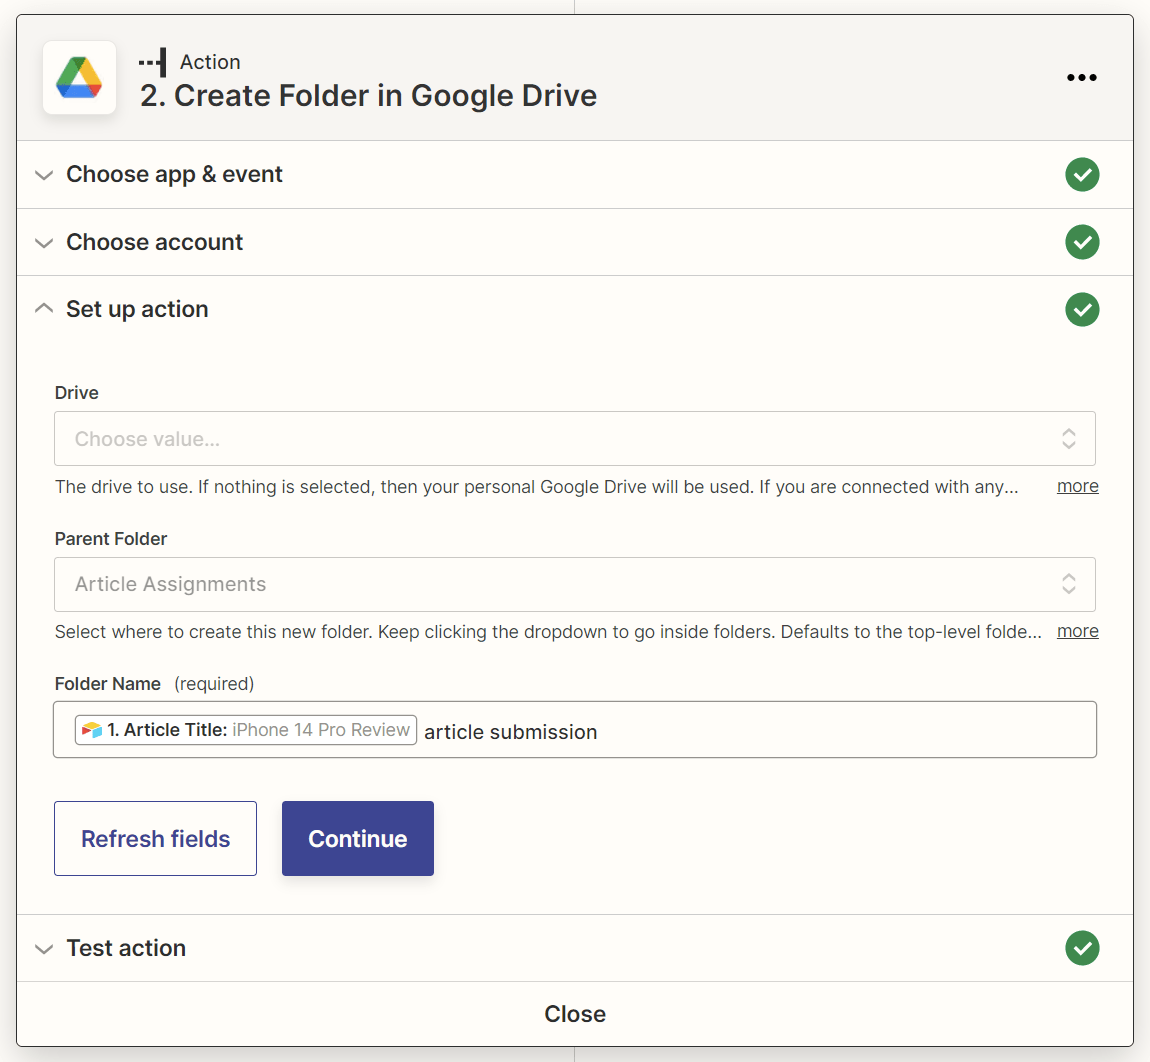
4. Add a “Create Folder in Google Drive” motion step to your Zap
Subsequent, add an motion step with:
- Google Drive because the motion app.
- Create Folder because the motion occasion.
For the motion step’s “Dad or mum Folder” subject, choose the Google Drive folder wherein the brand new submission folder needs to be created.
Additionally, present a reputation for the submission folder within the “Folder Identify” subject. You possibly can map the article title knowledge from Airtable right here to call your submission folder after the article’s title.
5. Add an “Add File Sharing Desire in Google Drive” motion step to your Zap
The Google Drive folder created by your Zap can have its sharing permissions disabled by default, so let’s add an motion step to grant folder entry to anybody who has the hyperlink to the folder.
This motion step ought to have:
- Google Drive because the motion app.
- Add File Sharing Desire because the motion occasion.
Map the file ID of the Google Drive folder created within the earlier motion step to the “File Id” subject of this motion step.

As well as, set the “Sharing Desire” subject to “Anybody on the web who has the hyperlink can edit.”

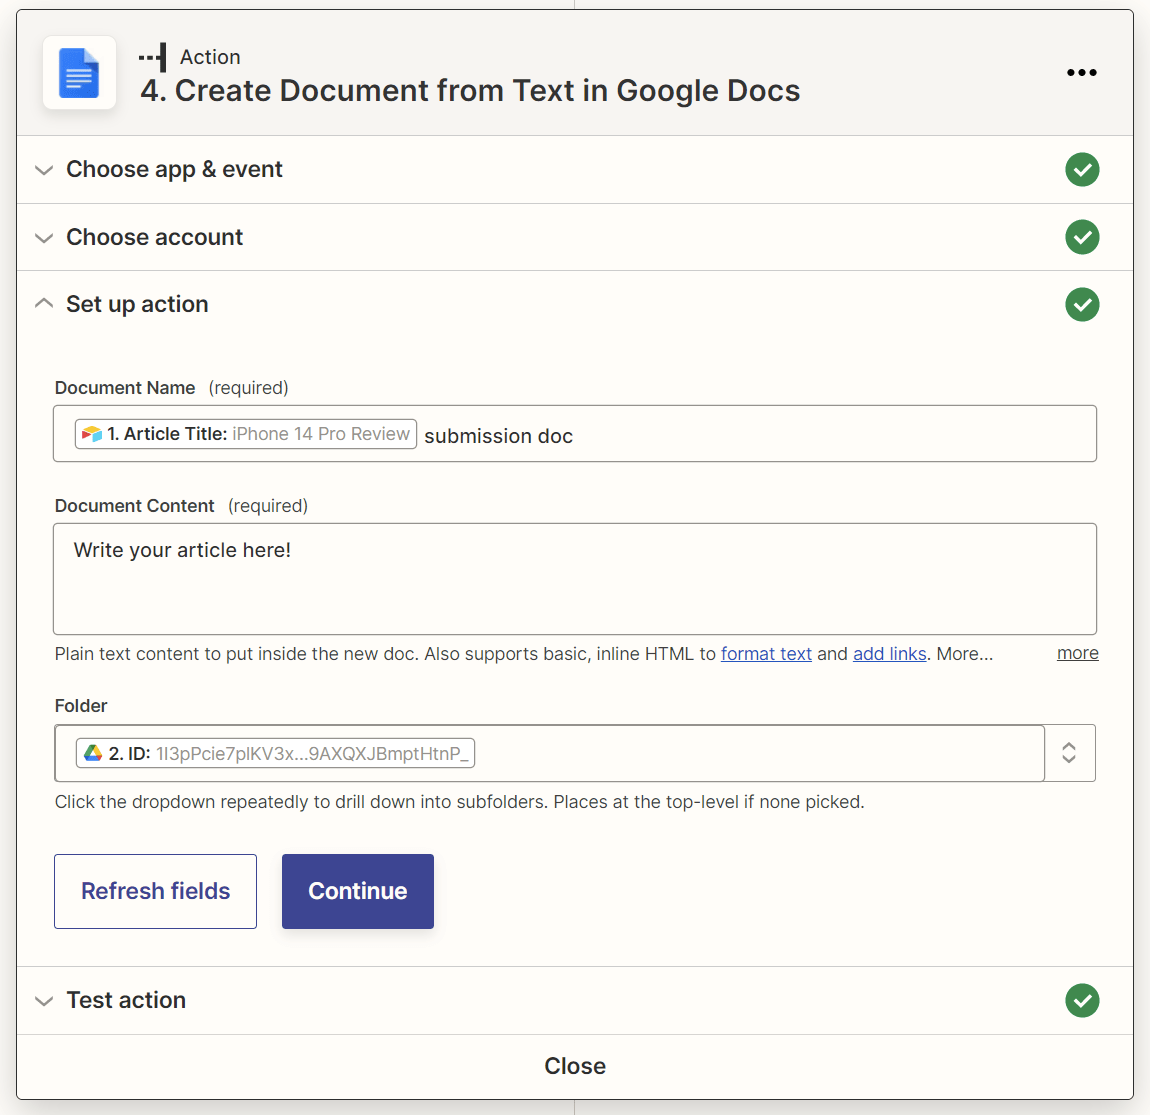
6. Add a “Create Doc from Textual content in Google Docs” motion step to your Zap
Now, let’s arrange the Google Doc that the author will use to submit their draft.
We’ll have the Zap create this submission Google Doc within the shared Google Drive submission folder. And for the reason that Google Drive folder can have basic entry enabled, anybody with the hyperlink to the Google Drive folder—and this consists of you—will even robotically get entry to the Google Doc.
No extra frustration over writers forgetting to grant entry to their Google Docs!
So add a brand new motion step to your Zap with:
- Google Docs because the motion app.
- Create Doc from Textual content because the motion occasion.
Map the article title knowledge from Airtable to the motion step’s “Doc Identify” subject, and the folder ID of the shared Google Drive folder to the “Folder” subject.
You’ll additionally want to incorporate some default textual content within the Google Doc, similar to “Write your article right here!”
7. Add a “Ship E mail in Gmail” motion step to your Zap
Lastly, we’ll get the Zap to make use of your Gmail account to electronic mail the author the article title, define hyperlink, due date, and hyperlink to the shared Google Drive submission folder.
Add a final motion step to your Zap with:
- Gmail because the motion app.
- Ship E mail because the motion occasion.
Map the author’s electronic mail handle from Airtable to the “To” subject for this motion step. Additionally, map the article title, define hyperlink, due date, and Google Drive submission folder hyperlink within the electronic mail physique.
I additionally advocate including your personal electronic mail handle to both the “Cc” or “Bcc” subject so that you get a duplicate of the automated electronic mail (and might verify it’s been despatched).
When you’re pleased along with your Zap, hit the Publish button to activate your automation!
Discovering electronic mail addresses for hyperlink constructing outreach is usually a large ache.
In spite of everything, most prospects don’t promote their electronic mail addresses publicly. And even if you happen to’ve managed to dig up their electronic mail addresses (or guess them utilizing trial and error), there’s no assure they work.
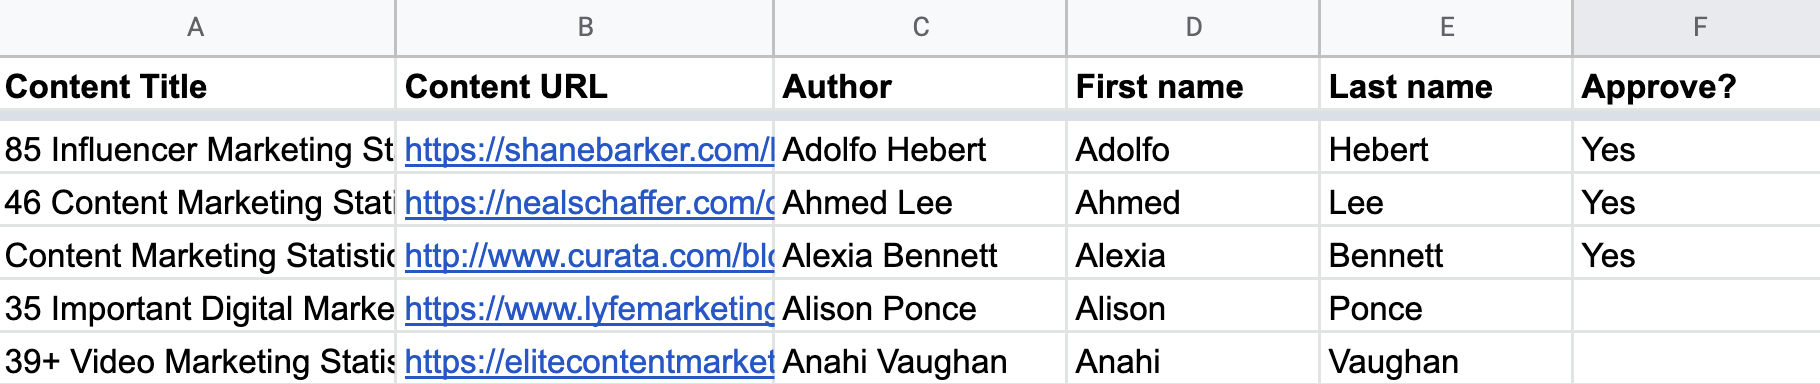
However utilizing Ahrefs’ Content material Explorer, you possibly can generate an enormous Google Sheets record of hyperlink constructing prospects that appears like this:
Then as you fill out the “Approve?” column for every prospect with knowledge—similar to “Sure” or “Authorized”—a Zapier automation will robotically do all these for you:
- Discover the prospect’s electronic mail handle utilizing the Hunter electronic mail lookup software
- Add the e-mail handle to your Google Sheet record of prospects
- Confirm the e-mail handle utilizing the NeverBounce electronic mail verification software
- Add the verified electronic mail handle to the Woodpecker.io electronic mail outreach software so you can begin sending personalized outreach emails
Right here’s learn how to set this up.
1. Get your record of prospects
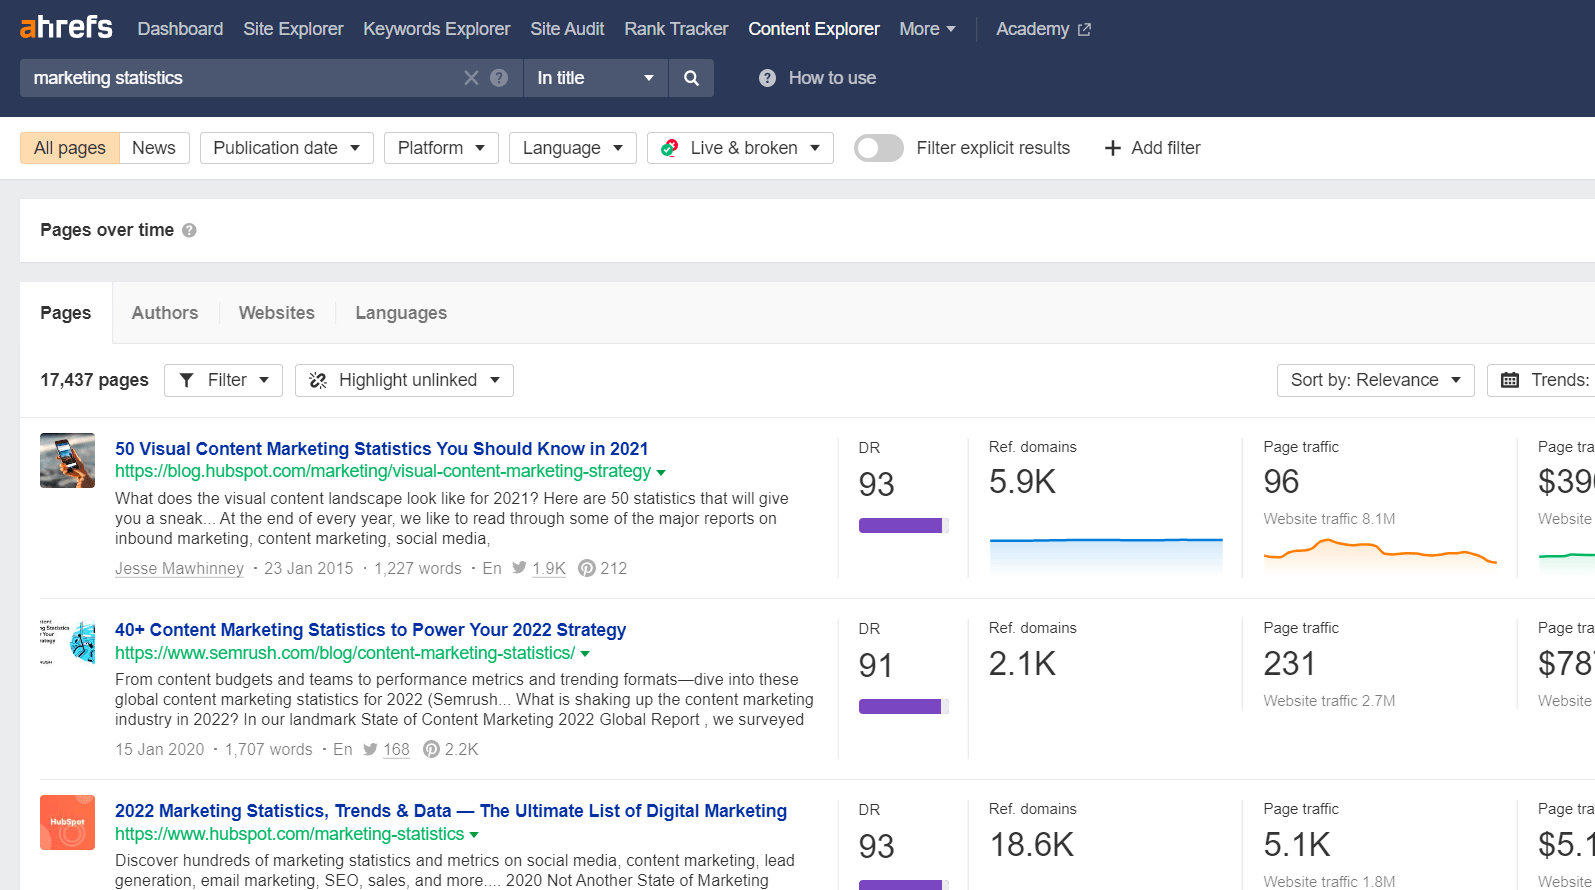
Launch Ahrefs’ Content material Explorer and seek for hyperlink prospects.
For instance, if you happen to just lately printed a advertising and marketing survey with distinctive insights and statistics, chances are you’ll need to search for advertising and marketing statistics pages to pitch. To do that, merely run an “In title” seek for “advertising and marketing statistics.”
Subsequent, filter your outcomes to point out solely webpages that are:
- In English (except you’re concentrating on webpages in one other language).
- Reside, because it’d be bizarre to succeed in out and say, “Hey, I discovered you thru [this webpage that no longer exists].”
- On web sites with a Area Score (DR) of 20 to 80 since you need to prioritize pursuing backlinks from authoritative web sites but additionally that your possibilities of getting backlinks from tremendous high-authority web sites are fairly low.

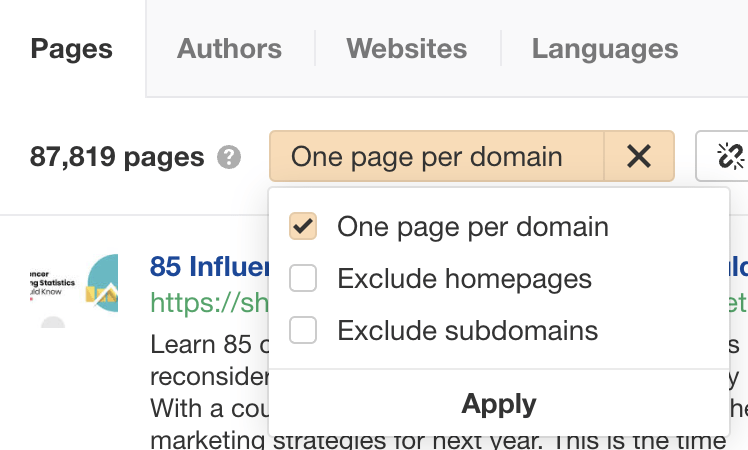
Add a final filter to point out just one web page per area (because you need to attain out to just one prospect per web site).
Click on the Export button to export your record of prospects in a CSV file.
2. Clear up your record of prospects
As talked about, we’ll be utilizing Hunter to assist us discover our prospects’ electronic mail addresses.
Hunter makes use of the primary names, final names, and domains of prospects to seek out electronic mail addresses, so we’ll clear up our record of prospects to supply Hunter with the precise knowledge it wants.
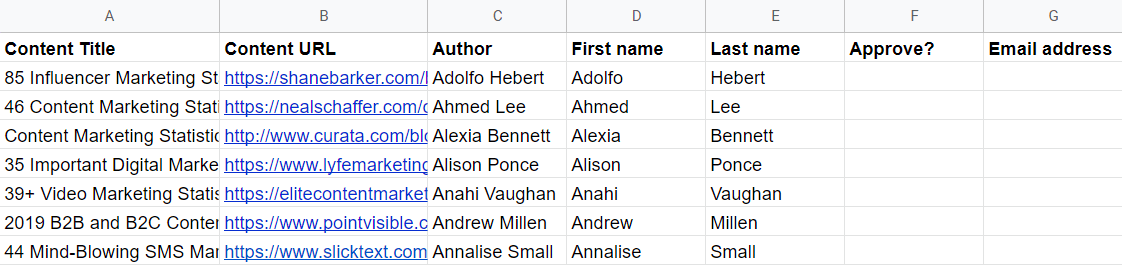
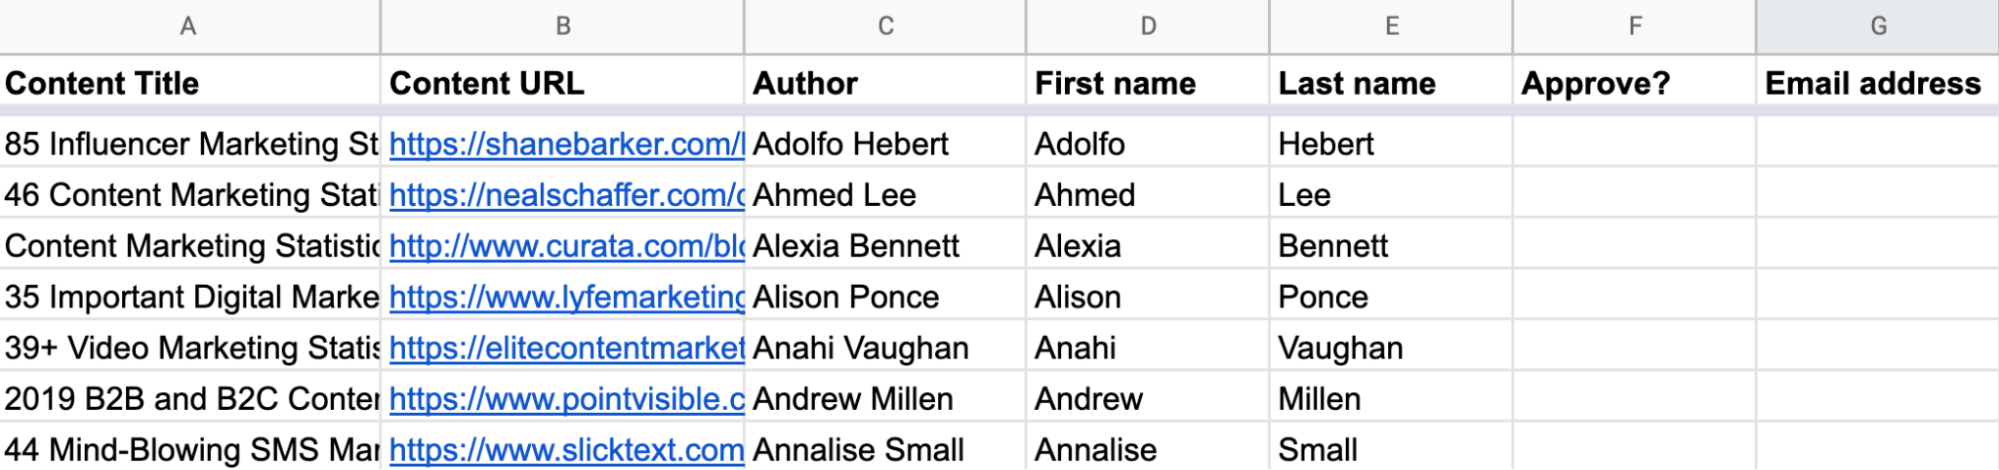
Import your CSV record of prospects in Google Sheets and delete all columns in it aside from:
- Content material Title
- Content material URL
- Writer
Additionally, among the prospects within the CSV don’t have writer names, so it’s value eradicating these rows from the CSV. To do that, simply filter for rows with empty writer names and delete them.
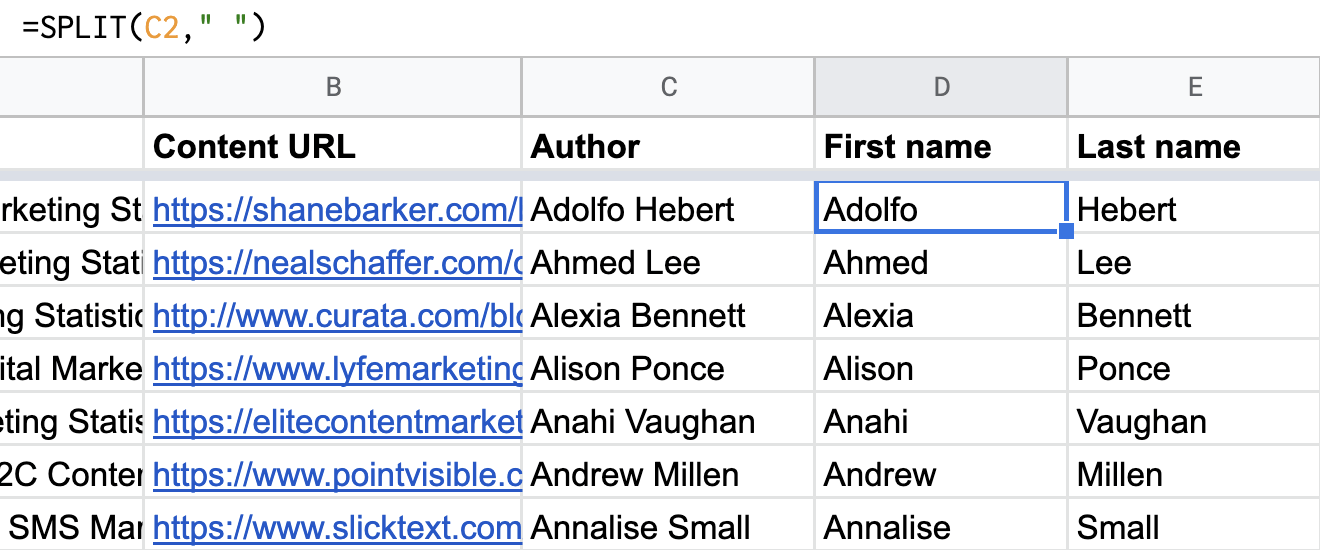
Subsequent, use the SPLIT components to separate the writer names into their first and final names primarily based on the house between their names.
Lastly, add two new columns to the sheet:
- Approve?: Including knowledge to this column will set off the Zapier automation we’ll be establishing subsequent!
- E mail Deal with: This column will retailer the prospect’s electronic mail handle (if discovered).
3. Arrange a brand new Zapier automation with a “New or Up to date Spreadsheet Row in Google Sheets” set off
In Zapier, create a brand new Zap with:
- Google Sheets because the set off app.
- New or Up to date Spreadsheet Row because the set off occasion.
Map the motion step’s “Set off Column” subject to your Google Sheet’s “Approve?” column.
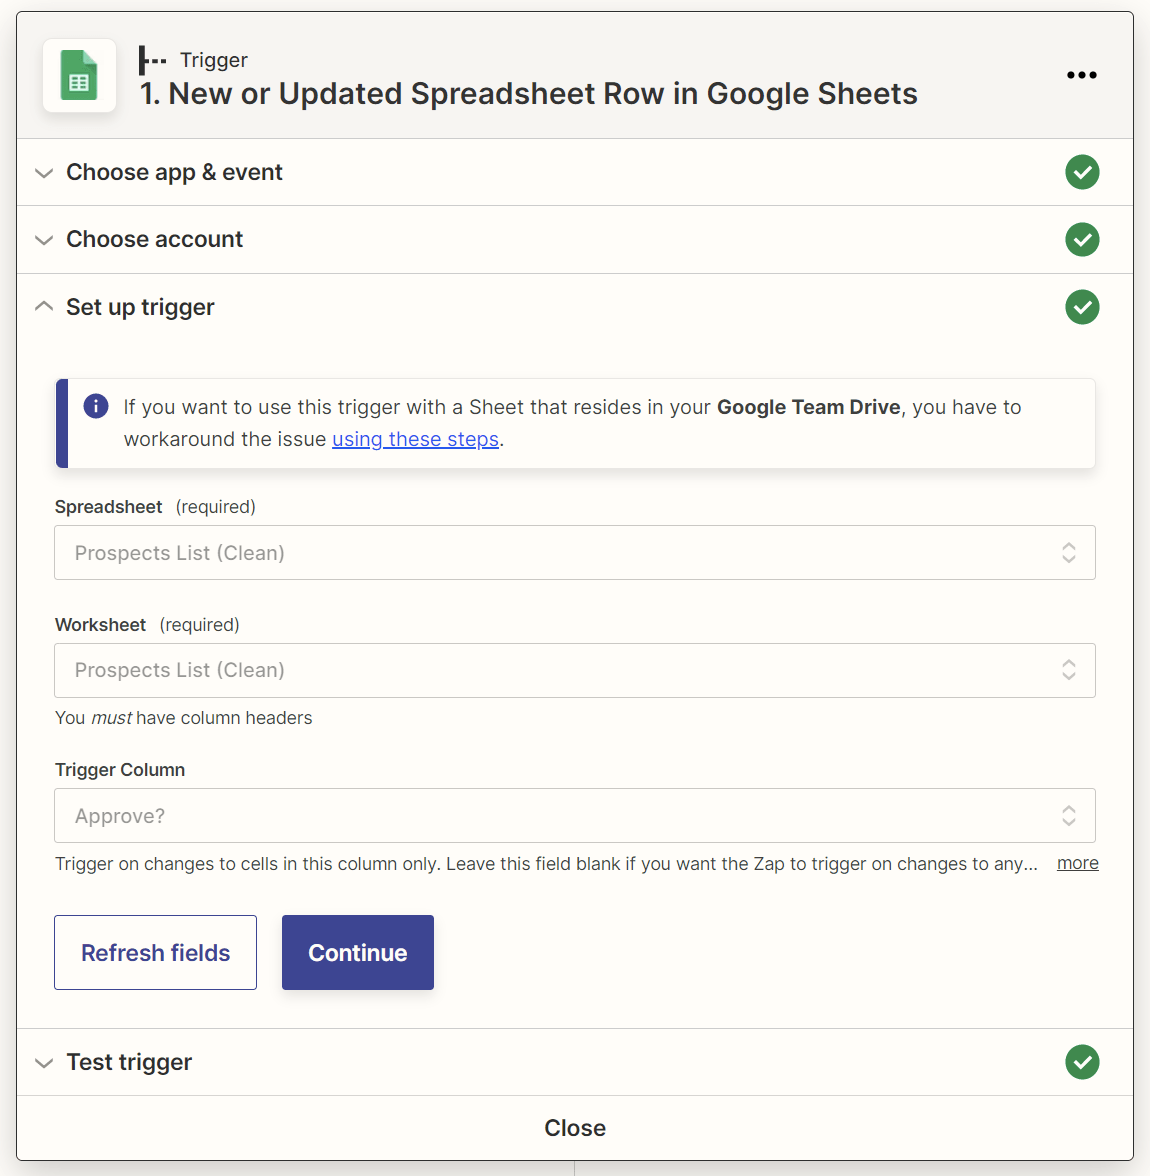
With this setup, you’ll set off your Zap everytime you add new knowledge—similar to “Sure” or “Authorized”—to the “Approve?” column for any prospect row.
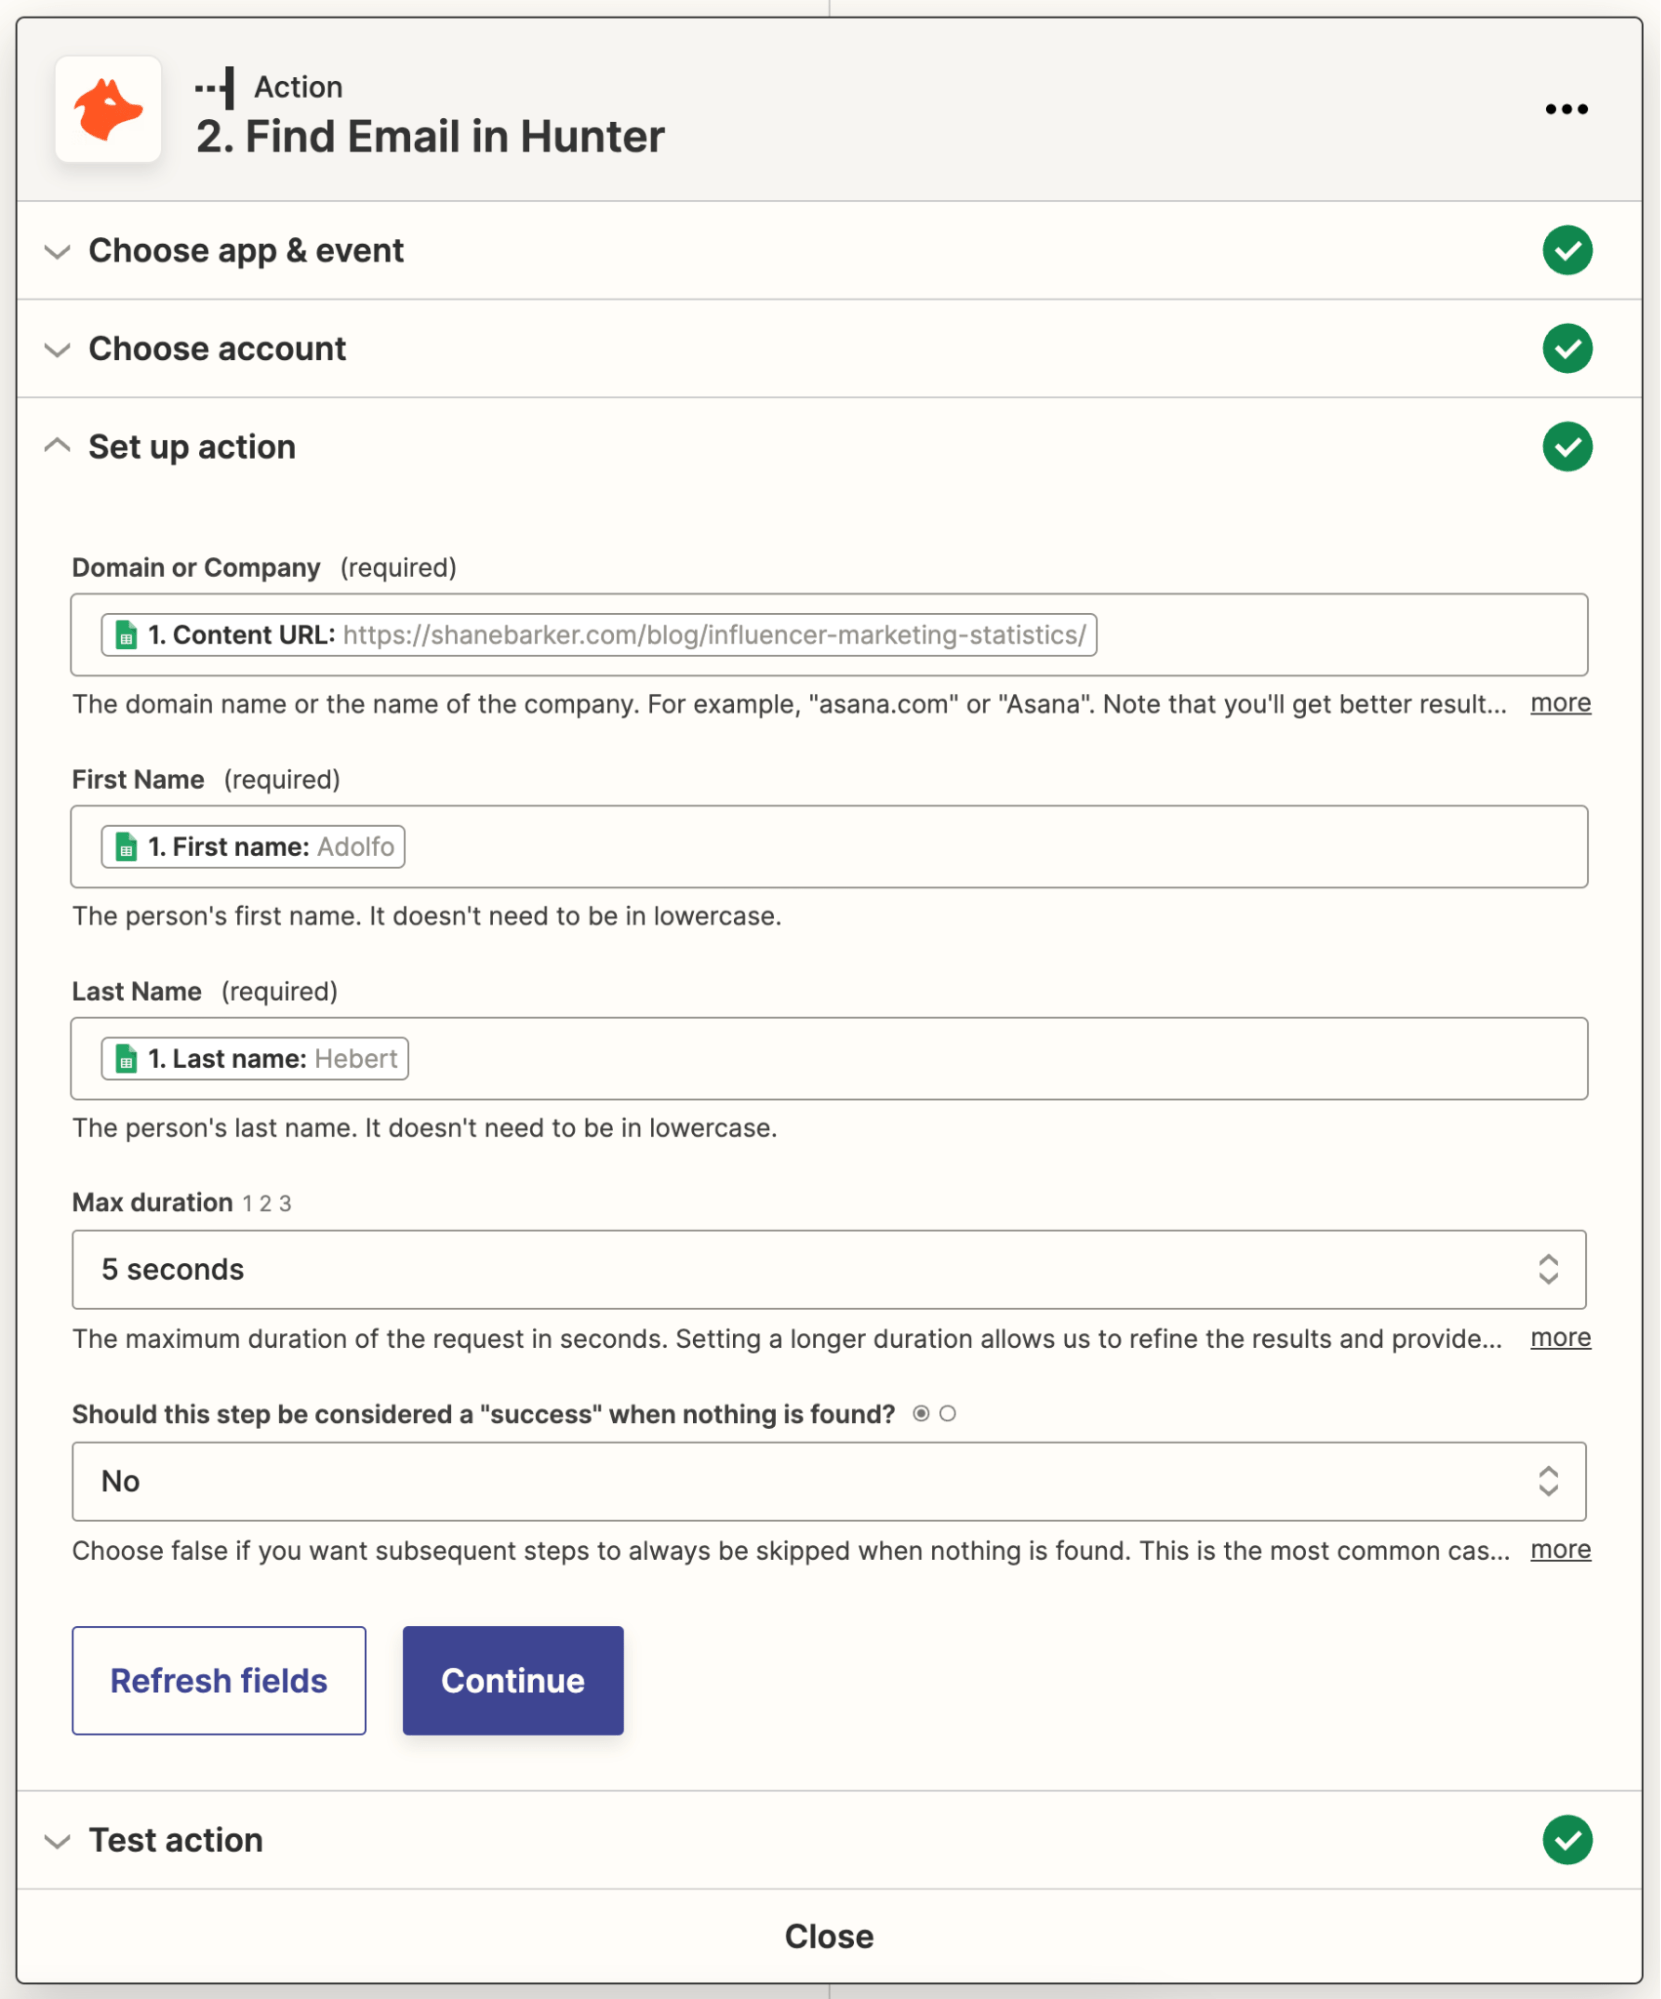
4. Add a “Discover E mail in Hunter” motion step to your Zap
Subsequent, add a brand new motion step with:
- Hunter because the motion app.
- Discover E mail because the motion occasion.
Map the “Content material URL,” “First Identify,” and “Final Identify” columns in your Google Sheet to the “Area or Firm,” “First Identify,” and “Final Identify” fields for this motion step, respectively.
5. Add an “Replace Spreadsheet Row in Google Sheets” motion step to your Zap
The subsequent motion step will replace your Google Sheet with a prospect’s electronic mail handle if Hunter finds it. Use:
- Google Sheets because the motion app.
- Replace Spreadsheet Row because the motion occasion.
Map the Row Variety of the up to date row within the set off step to this motion step’s “Row” subject.
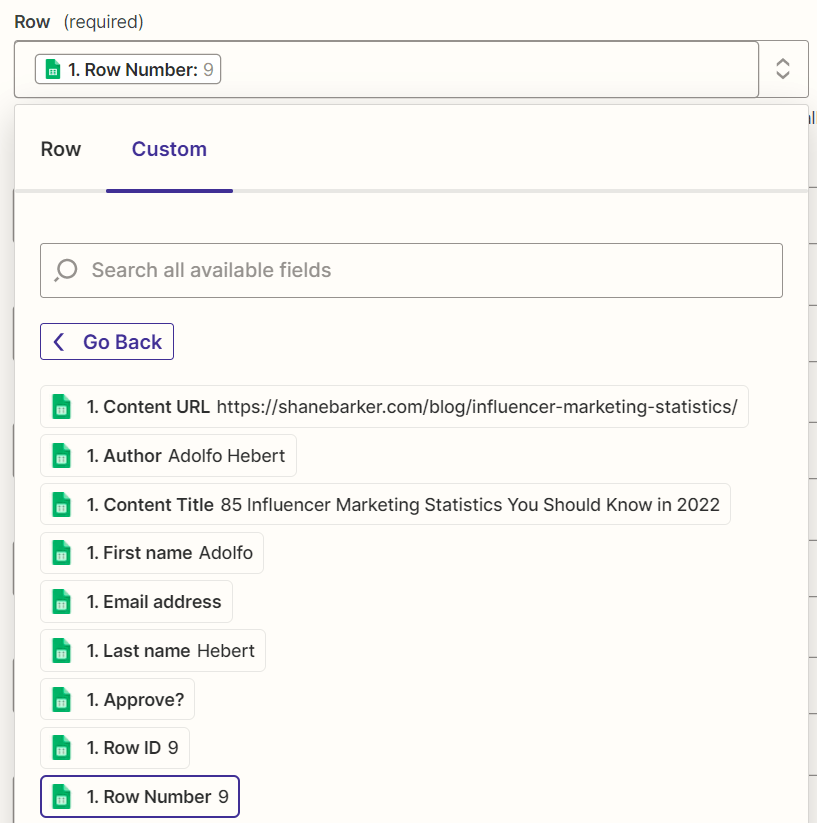
Additionally, map the e-mail handle that Hunter discovered within the earlier motion step to the “E mail Deal with” subject of this motion step.
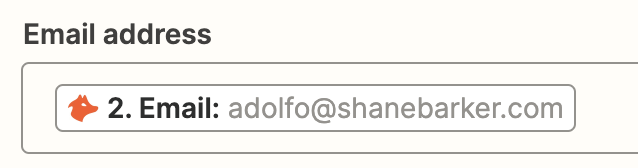
Sidenote.
This electronic mail handle doesn’t exist. It’s for demo functions solely.
6. Add a Filter motion that lets the Zap proceed provided that Hunter has discovered an electronic mail handle
Subsequent, arrange a Filter motion that lets the Zap proceed provided that the e-mail handle knowledge discovered by Hunter incorporates the “@” image.
That’s as a result of all electronic mail addresses have the “@” image. If Hunter occurs to seek out an electronic mail handle worth that doesn’t embrace this image, we gained’t need to waste time verifying it.

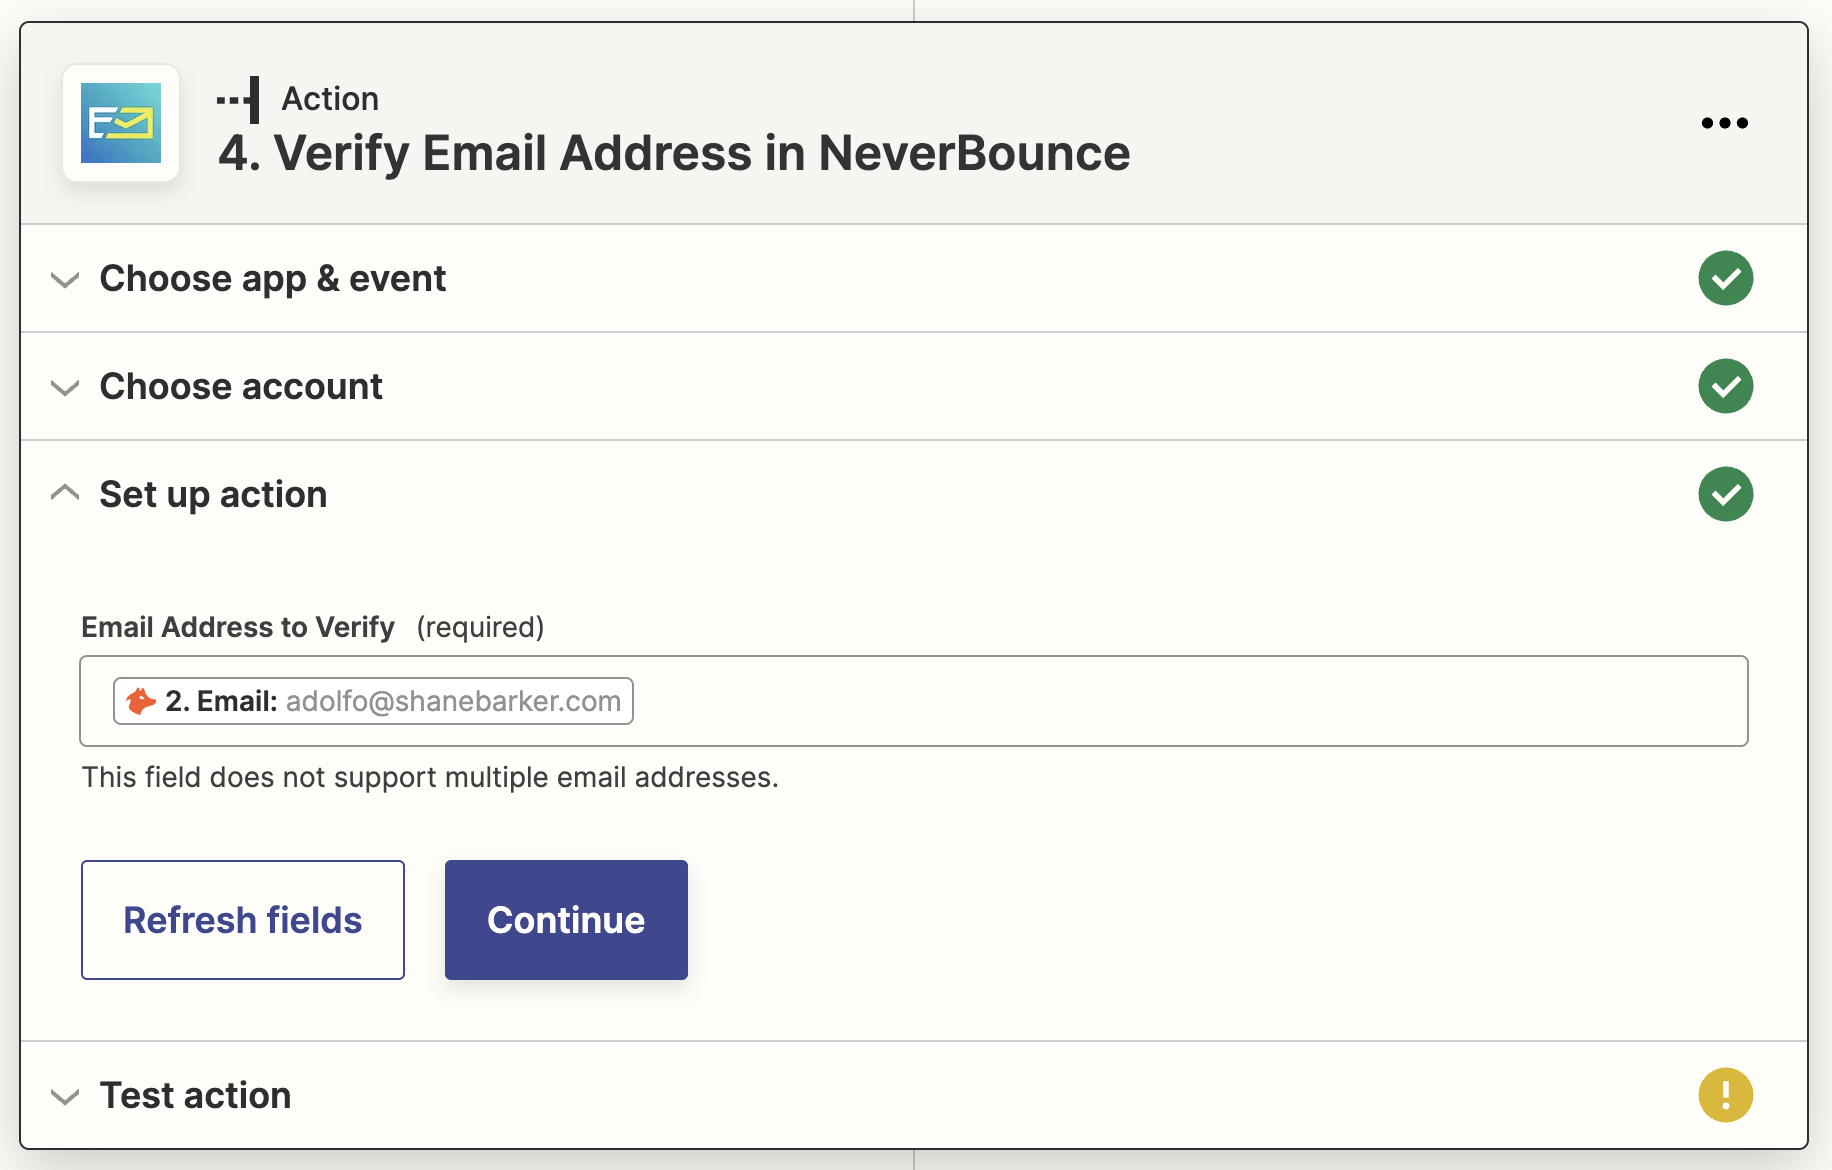
7. Add a “Confirm E mail Deal with in NeverBounce” motion step to your Zap
Now, we’ll use NeverBounce to confirm the validity of the e-mail addresses that Hunter discovered. Add a brand new motion step with:
- NeverBounce because the motion app.
- Confirm E mail Deal with because the motion occasion.
Map the e-mail handle that Hunter discovered to this motion step’s “E mail Deal with to Confirm” subject:
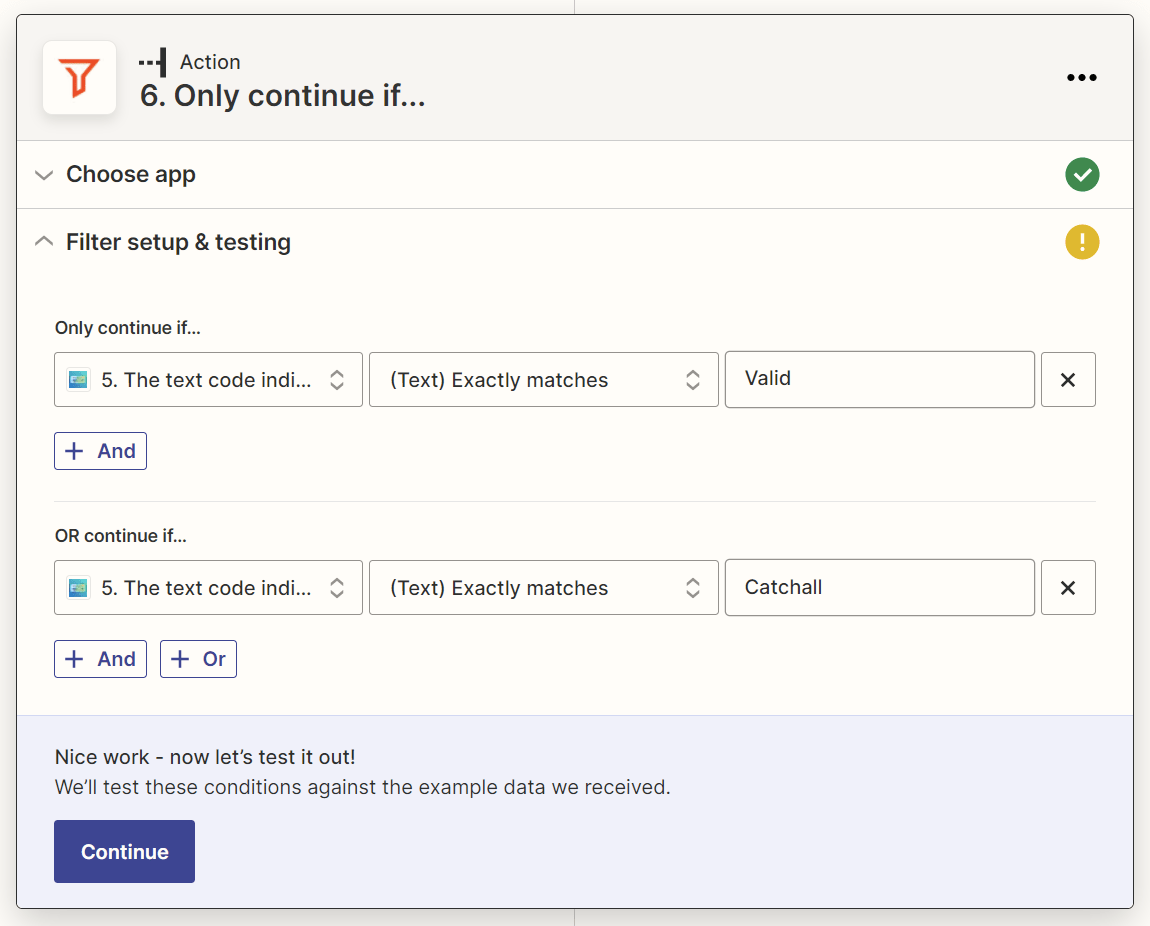
8. Add a Filter motion that lets the Zap proceed provided that NeverBounce returns a “Legitimate” or “Catchall” standing for the e-mail handle
When NeverBounce verifies an electronic mail handle, it can return one among 4 standing textual content codes: Legitimate, Catchall, Invalid, and Unknown. E mail addresses marked with the “Legitimate” and “Catchall” NeverBounce standing codes have the best chance of being legitimate.
So we’ll add a Filter motion that lets the Zap proceed provided that an electronic mail handle’s NeverBounce standing textual content code matches both “Legitimate” or “Catchall” precisely.
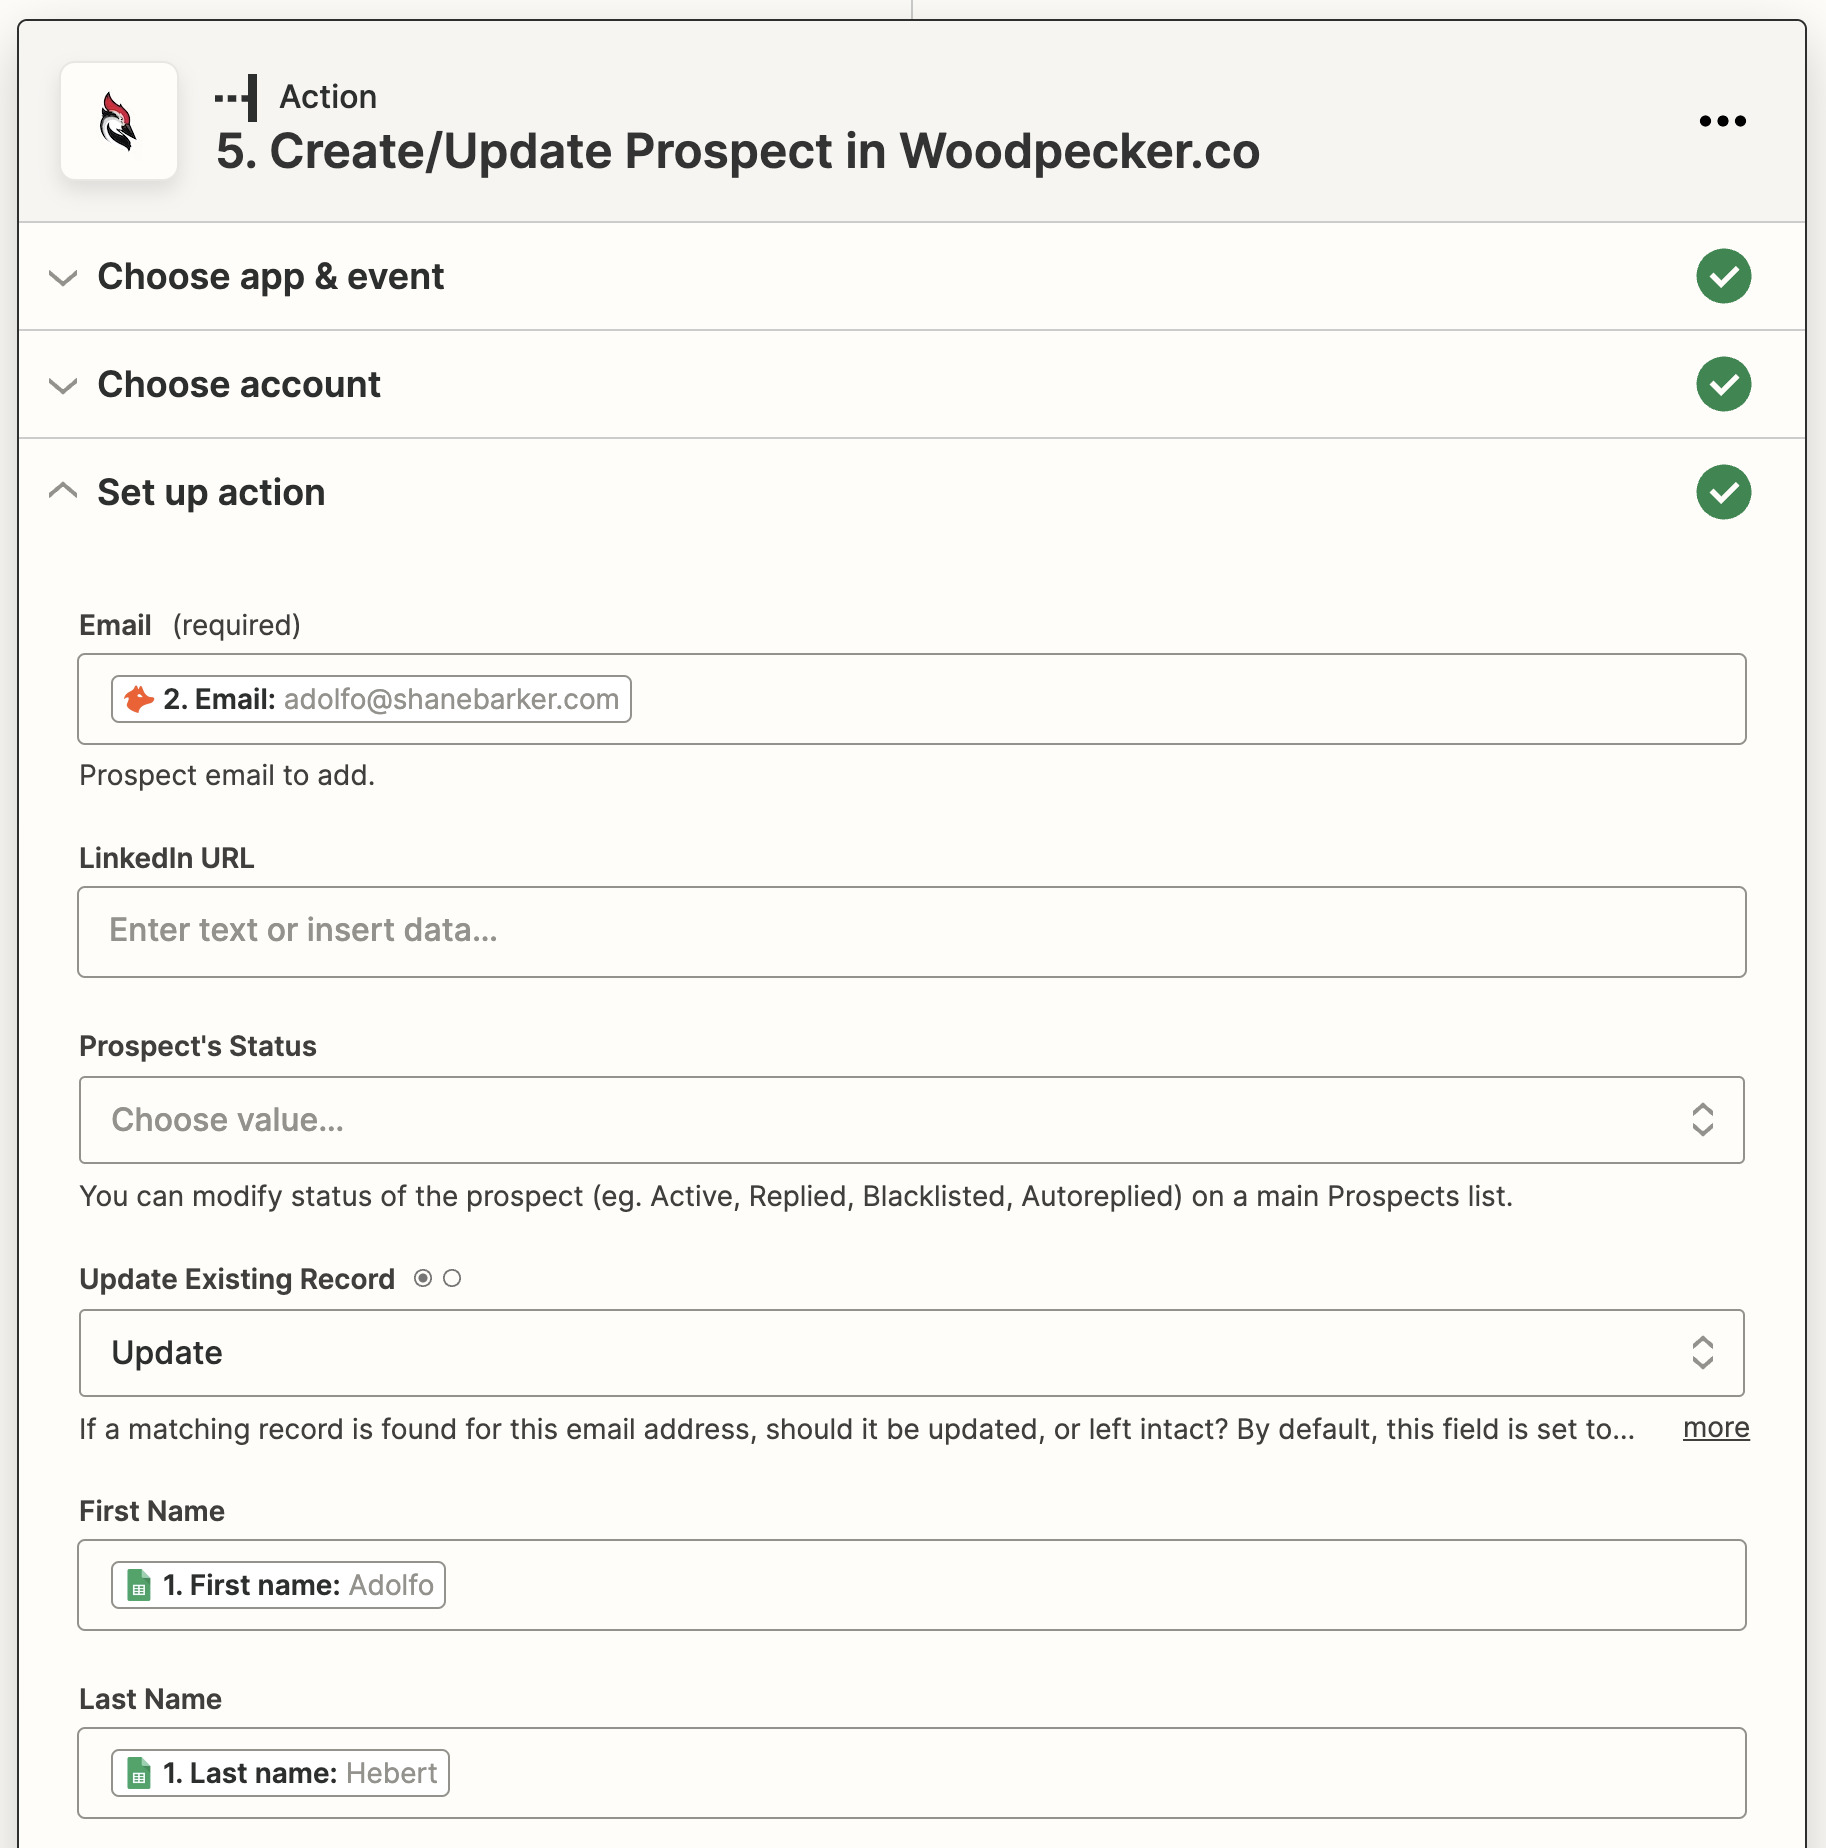
9. Add a “Create/Replace Prospect in Woodpecker.co” motion step to your Zap
Lastly, we’ll arrange the Zap so as to add the verified electronic mail handle to Woodpecker.co.
Create a final motion step with:
- Woodpecker.co because the motion app.
- Create/Replace Prospect because the motion occasion.
Map the verified electronic mail handle to the motion step’s “E mail” subject, and your prospect’s first and final title (as obtained from Google Sheets) to the “First Identify” and “Final Identify” fields, respectively.
Hit the Publish button to show your Zap on.
Now, whenever you fill out the “Approve?” column for prospects in your Google Sheet, your Zap will robotically do the heavy lifting of discovering and verifying their electronic mail addresses utilizing Hunter and NeverBounce and including the verified electronic mail addresses to Woodpecker.co.
You possibly can then customise your hyperlink constructing outreach emails in Woodpecker.co for every verified electronic mail handle and, hopefully, snag your self some backlinks!
Remaining ideas
search engine marketing automation takes some preliminary setup, however it’s wonderful to observe your processes run robotically after that. It’s nearly like magic.
And aside from the search engine marketing processes we’ve shared right here, there are in all probability loads others you possibly can automate.
Consider the apps you recurrently use for search engine marketing work. When you can join these apps utilizing Zapier or another workflow automation software, automating the workflows they assist is probably going greater than potential.
Received questions? Ping me on Twitter.
[ad_2]
Source_link